Eyeshadow Pressing


.

You ever take your makeup bag out of your purse just to find your favorite eyeshadow has shattered?

I have and learned quickly how to fix this problem. I'm going to teach you how to repair this would be disasters problem.

What you'll need:
Crafting board
Rubbing Alcohol
Shattered Eyeshadow
Empty container
Something to mix the shadow
Cotton balls & Q Tips
Paper Towel
Coin
Blow Dryer (optional)

  1. Sanitizing the container you want to hold your pressed eyeshadow. You can doing this buy soaking a cotton ball with rubbing alcohol. You can use the q tips to get the corners. Allow to dry.
  2. Step 2 - Place your shattered eyeshadow into your container
  3.  Slowly (and I do mean SLOWLY) start to pour rubbing alcohol into the container.
  4. Start mixing it. At first it will be clumpy. That is okay. Your best bet is to get all the powder wet so you don't get a powder cloud.
  5. Once you get the powder to a clumpy goo substance start to add more rubbing alcohol. (Don't worry about over adding R.A. it will dry up anyway. However it does add to the set time)
  6. After you've gotten the eyeshadow mixed completely into a liquid form give it a light tap just so you have a smooth top surface.
  7. Now you have to options there. You can either A: use your blow dryer to speed up the drying process or B: let air dry. (I don't have that kind of patience.) Turning your blow dryer on its low setting (if you put it on high...well you'll defiantly be wearing your eyeshadow just not the way you really want to....take my word for it...) Note: This speeds up the process but won't completely dry the shadow.
  8. Allow to dry over night. (Awful I know! Why can't it just dry... like...NOW?!)
  9. Now take your dry eyeshadow and place your paper towel (or you can use a textured fabric scrap if you'd like a prettier texture) inside the container and use the coin to press the eyeshadow. This compacts the shadow so its strong Note: THIS IS VERY IMPORTANT TO DO!!
  10. Enjoy your newly formed eyeshadow! YAY!
Images Below of the steps.

Busy Bee...


.

Sorry I haven't posted lately guys!

Lots going on! Working on some freelance and in between switching jobs as well as celebrating my honey's birthday.

But I promise a new post is coming soon!

Coming soon... Eyeshadow pressing. So stay tuned!

Water Lily Events - Summer Norwell


.

Sorry I've been gone so long. I just got over having salmonella and am finally feeling back up to par. Let me you tell you that wasn't fun! But on to the good stuff

As I told you earlier I had the privilege to design one of my girl friend's identity for her new business in party planning and had promised to share with you. The business card was approved and I still have the rest to design but I wanted to share it with you guys where your at right now.

So take a look and enjoy!


Text Logo


Business Card (Front - top | Back - bottom)


Up close detail of lily on back of business card.

Letter head, envelope and promotional piece style to come!

New Project


.

Had to tell you guys about a new project I'm going to start working on!

One of my girl friends just received her diploma for a personal wedding consultant and I've recieved the honor of designing her identity and possibly a website! Super excited! I'll keep you guys posted with the concepts to the final product!

So stay tuned!

Dido's Shoppe


.

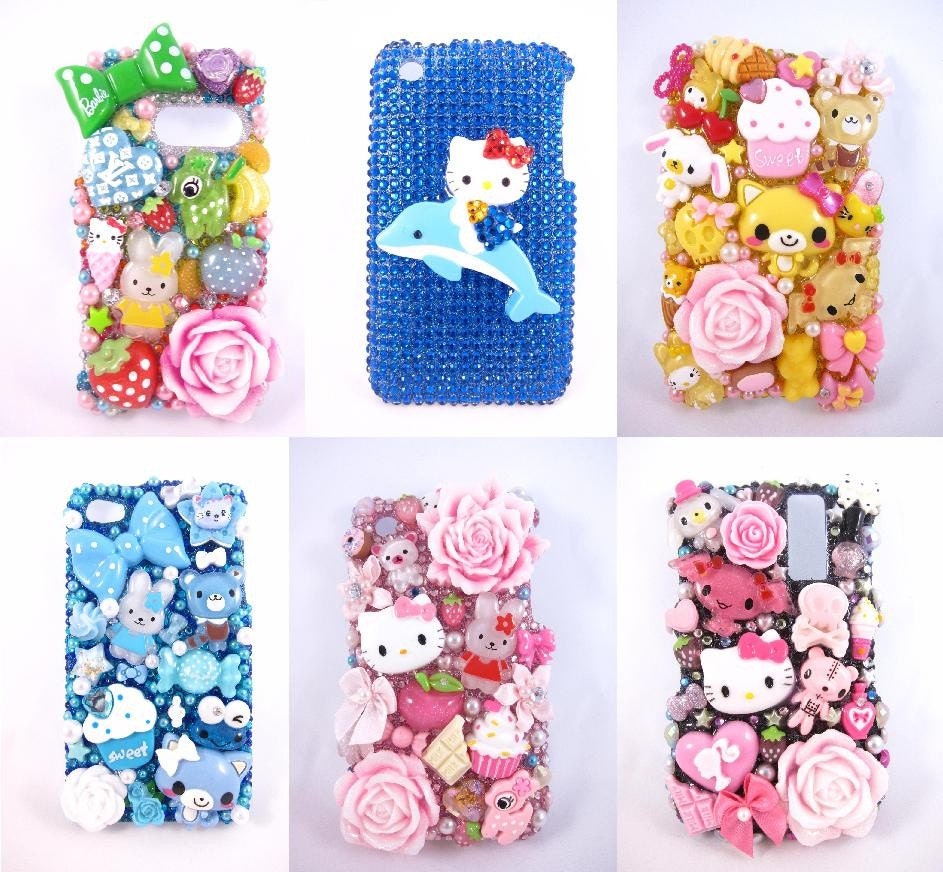
Came across this cute Etsy shop today and had to share!


Dido's Shop is a Kawaii and deco accessories shop. While they may be slightly pricey upon first look each case it made individual and is super cute! This would be a perfect gift for my mom or sister as they are OBSESSED with Hello Kitty. I definatly recommend taking a look! Here a few samples of her cases below:


You can find her store here: Dido's Shoppe

Welcome!


.

Hello and welcome to Apartment for Ideas! 

I'm Ann Marie and I'll be your host on this random and fun journey.

In the past ten months that I've lived with my long time boyfriend I have developed an avid interest in crafting, baking, decorating and anything random interesting DIY thing I came come across. So with the new year in its early days I decided what better thing to do then blog about the next years worth of random projects I do.

So sit tight and enjoy the ride!